How to Use a Portable Jump Starter
To use a portable jump starter, check compatibility and connect the clamps as both manuals direct, then start the engine when the unit indicates it's ready. Follow the shutdown and removal instructions, then recharge the pack.
On this page (9 sections)
- How do you use a portable jump starter step by step?
- What should you check before connecting the clamps?
- Where do the red and black clamps go?
- What if the engine doesn't start?
- How do you disconnect the pack and care for the battery afterward?
- Which portable jump starter should you choose?
- What mistakes should you avoid when using a jump pack?
- How should you store and recharge the jump starter?
- Which choice makes sense before your next flat battery?
To use a portable jump starter, check vehicle compatibility, connect the clamps as both manuals direct, and start only after the ready signal. Once the engine runs, follow the shutdown and removal steps, then recharge the pack.
A jump starter supplies a short burst of starting power; it doesn't repair a battery or fully recharge it. For the basics behind that burst, see how a jump starter works.
How do you use a portable jump starter step by step?
Prepare the vehicle, make the approved connections, and follow the pack's ready signal. Read the instructions before an emergency so you can find the controls and jump points without rushing.
- Park safely. Set the parking brake, put an automatic transmission in Park or a manual in Neutral, and turn off the ignition and accessories.
- Check the equipment. Confirm the battery voltage, engine compatibility, pack charge, and condition of the battery and cables.
- Find the connection points. Use the vehicle manual to locate the positive terminal and approved negative connection or ground point.
- Connect with the pack off, unless its manual directs otherwise. On a typical negative-ground vehicle, connect red to positive first, then black to the specified negative or ground point.
- Enable the pack as directed. Check its lights or display for a ready signal and resolve any warning before proceeding.
- Attempt a start. Stay within the manual's cranking limit and allow its required cooldown before another attempt.
- Disconnect as directed. After the engine runs, follow the pack's shutdown steps and removal order, keeping cables away from moving parts.
If you're beside fast traffic or can't reach the connection points safely, call roadside assistance. A jump pack doesn't make an unsafe roadside position safe.
What should you check before connecting the clamps?
Check voltage, battery condition, and access to the correct jump points. All 3 packs below are for 12V systems, so they aren't suitable for a 24V starting system.
Don't connect to a cracked, leaking, swollen, frozen, or otherwise damaged battery. If a battery may be frozen after deep discharge in cold weather, get help before attempting a jump.
Inspect the pack, cables, and clamps for damage. Wear eye protection, remove dangling metal jewelry, and keep flames, cigarettes, and sparks away from the battery.
Don't assume a hybrid or electric vehicle follows a conventional car's procedure. Consult its manual for approved low-voltage jump points and restrictions; never connect a jump pack to high-voltage components.
How do you prepare a portable jump starter for first use?
Fully charge it as directed and learn its controls before putting it in the car. Check what charger and cable it needs, since an included cable doesn't always mean an included wall charger.
Locate your vehicle's jump points while you have good light. Check the cable reach with the pack disconnected, and identify a stable place for it away from belts, fans, and hot surfaces.
Where do the red and black clamps go?
Red connects to the marked positive point; black goes to the negative connection or ground point specified by the manuals. Some vehicles use remote jump posts, so direct access to the battery isn't always necessary.
Look for the positive (+) and negative (−) markings rather than relying only on cable color. Don't choose a random bolt, fuel line, or thin metal bracket as a ground.
Make firm contact with the approved metal connection surface. If heavy corrosion or a loose terminal prevents secure contact, resolve that problem before proceeding.
Keep the clamps apart and don't reposition them while the pack is active. Shut it down as instructed before correcting a connection.
What if the engine doesn't start?
Stop after a failed attempt and check the fault signals before trying again. Repeated cranking can heat the cables and starter motor, so follow both manuals' attempt and cooldown limits.
A clicking sound or slow cranking can point to inadequate power or poor contact. Check charge level and clamp placement, but don't assume every starting problem comes from the battery.
If the engine turns over at normal speed but won't run, it may have a fuel, ignition, or other fault. Adding more jump attempts won't resolve those problems.
Some packs have a manual boost or override mode for very low battery voltage. Don't use it to clear an unexplained warning; read its conditions and precautions first because normal safeguards may work differently in that mode.
Stop if you see smoke, swelling, leaking, unexpected sparks, or unusual heat. Move away and seek help; call emergency services for fire or immediate danger.
How do you disconnect the pack and care for the battery afterward?
Remove the pack promptly as directed once the engine runs, then arrange proper battery charging if needed. On a typical negative-ground setup, removal reverses connection order, with black off before red, but both manuals govern your procedure.
Keep clamps apart during removal and replace any jump-point covers. Engine fans can start unexpectedly, so keep hands, loose clothing, and cables clear.
A successful start doesn't prove the battery is healthy or fully charged. If the vehicle stalls, shows a charging-system warning, or needs another jump soon, have the battery and charging system checked.
Read whether a jump starter can charge a battery before relying on it for recovery. For a battery that needs a full recharge, our car battery charger guide explains the more suitable tool.
Which portable jump starter should you choose?
Match the vehicle's voltage and engine size first, then choose features you'll actually use. Peak amp numbers alone don't settle the choice, especially across different brands.
Our guide to how many amps you need for a jump starter explains sizing. For the rest of the decision, use how to choose a jump starter to weigh storage, charging, and controls.
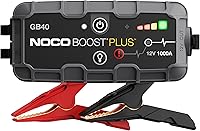
NOCO Boost GB40: for everyday cars and smaller diesels
Choose the GB40 for a compatible everyday vehicle when compact storage matters. NOCO rates this 1000A pack for engines up to 6.0L gas or 3.0L diesel.
Its spark-proof connections and reverse polarity protection help with connection errors, but you still need to identify the correct points. The IP65-rated housing adds protection against dust and water exposure without making open connections waterproof.
NOCO says recharging takes 3 hours, making a planned recharge after use practical. Skip it if your engine exceeds its stated range or you need the GT4000S's laptop-charging feature.
Gooloo GP4000: for larger engines and a shared vehicle kit
Choose the GP4000 for its broader stated engine coverage and included storage case. GOOLOO rates this 4000A pack for all gasoline engines and diesel engines up to 10.0L.
The EVA case helps keep the pack, smart jumper cable, and adapters together when moving the kit between vehicles. It also has USB outputs for emergency device charging, but no wall charger is included.
Its BOOST button addresses extremely low battery voltage under the manual's instructions. Skip this 3.9 lb unit if a lighter emergency kit matters more than its engine coverage.
Gooloo GT4000S: for frequent travel and laptop charging
Choose the GT4000S if quick recharging and a visible status screen fit your travel routine. GOOLOO rates it at 4000A peak for engines up to 12.0L gas or 10.0L diesel.
Its two-way USB-C charging supports up to 100W, including power for compatible laptops. GOOLOO says a full recharge takes 1.2 hours with suitable power, and a 100W car charger is included.
Skip it if you only need occasional car starts and won't use fast charging or its extra outputs. Charging phones or laptops also uses energy you may need for an emergency start.
What mistakes should you avoid when using a jump pack?
Avoid guessing, repeated cranking, and relying on a pack you haven't charged. Safety features help, but they don't replace correct connections or a compatible battery system.
- Guessing the ground point: use the vehicle's approved point, even if another bolt looks easier to reach.
- Ignoring a fault light: stop and identify the warning before another attempt.
- Treating advertised start counts as a reserve gauge: engine size, temperature, and battery condition affect each attempt.
- Leaving the pack near moving parts: choose a stable position and route cables before starting.
- Using it as a routine cure: repeated flat batteries need diagnosis, not repeated boosts.
How should you store and recharge the jump starter?
Recharge after use and follow a calendar reminder during storage. Check its charge before a long trip instead of waiting for the next flat battery.
GOOLOO recommends charging the GP4000 every 2–3 months during extended idle periods and the GT4000S at least every 3 months. Follow NOCO's maintenance schedule for the GB40.
The GT4000S has a charging temperature range of 14°F to 113°F, narrower than its stated operating and storage range of -4°F to 140°F. If a pack is too hot or cold to charge, let it reach an allowed temperature naturally.
Keep the pack dry, out of prolonged direct sunlight, and secured against sliding around. Protect the clamps from accidental metal contact and inspect the case and cables during charge checks.
See how to charge a jump starter for charging steps and how long a jump starter lasts for care and replacement guidance.
Which choice makes sense before your next flat battery?
Pick the GB40 for compact everyday coverage, the GP4000 for larger engines, or the GT4000S for fast recharging and laptop power. Confirm the chosen model fits your vehicle before buying.
Knowing how to use a portable jump starter starts with finding your jump points and learning the ready and fault signals before you need them. Use our portable jump starter buying guide to build a kit you'll keep charged and within reach.
Frequently asked questions
Which clamp goes on first when using a portable jump starter?
For a typical negative-ground vehicle, the red positive clamp goes on first, but follow both manuals for your setup. Attach it to the marked positive terminal or designated jump point, then attach the black clamp where instructed.
Keep the pack off during connection unless its instructions specify otherwise.
How long should you leave a jump starter connected?
Leave it connected only for the process described in its manual; there is no universal waiting period. Start when the ready signal appears, respect the limits on cranking and cooldown, and remove the pack as directed once the engine runs.
Leaving it attached longer does not fully recharge the vehicle battery.
Can you use a portable jump starter in the rain?
Use it outdoors only within the weather limits in its manual, and keep electrical connections dry. A water-resistant housing does not make exposed clamps or charging ports waterproof.
If you cannot keep the unit and connections dry, or standing water makes the location unsafe, call roadside assistance.
What should you do if the car will not start with a jump starter?
Stop and check the charge level, connection points, clamp contact, and device fault signals before another attempt. Follow the required cooldown and attempt limits.
If the engine cranks normally but will not run, another fault may be involved, so repeated boosting is unlikely to help and you should seek assistance.